

It’s easy to forget about your roof. If it’s doing its job well, you’re warm and dry and never really have to give it a second thought. However, without regular maintenance, your roof will suffer and small problems that could have been easily fixed become large issues of time that can become expensive to repair.
Here at Manchester Roofers, we’re strong advocates of roof maintenance and are here to help you keep your roof in tip-top condition so that hopefully, you never have to pay out for a sudden avoidable cost. Here are our top tips for roof care.
Key Summary
No time to read the details? Here’s the important info:
- Leaky roofs can result from ageing, damaged shingles, poor flashing, or clogged gutters.
- Early detection of leaks prevents extensive damage and saves costs.
- Temporary measures include using roof patches and sealants.
- Regular roof inspections and maintenance can prevent potential leaks.
- Always prioritise safety; seek professional help when uncertain.
Causes of a Leaky Roof
Understanding the common causes of roof leaks can aid in prevention and timely repair. Let’s delve into the primary reasons behind leaky roofs and what might have caused the damage:
Age of the Roof
As roofs age, they undergo wear and tear. Constant exposure to sun, rain, and other elements causes roofing materials to deteriorate, making them susceptible to leaks. Even the best roofing materials have a lifespan, and as they near their end, they lose their effectiveness as a barrier against water.
Broken or Missing Shingles
Shingles act as the primary line of defence for your roof. Whether due to high winds, falling debris, or simple wear and tear, shingles can break or become displaced, creating vulnerable areas through which water can penetrate.
Damaged Flashing
Flashing is the metal barrier placed around intersections on your roof, such as chimneys, skylights, and vents. Over time, this metal can corrode, or it might separate from the roofing material, creating gaps that allow water entry.
Clogged Gutters
Proper water flow away from the roof is essential. When gutters become clogged with leaves, twigs, or other debris, the resulting water buildup can find its way under the roofing materials and into the home.
Holes in the Roof
Over time, roofs might undergo multiple installations or adjustments, like the addition of a satellite dish. If these installations are removed or adjusted, they might leave behind holes. If not adequately sealed, these holes become direct entry points for water.
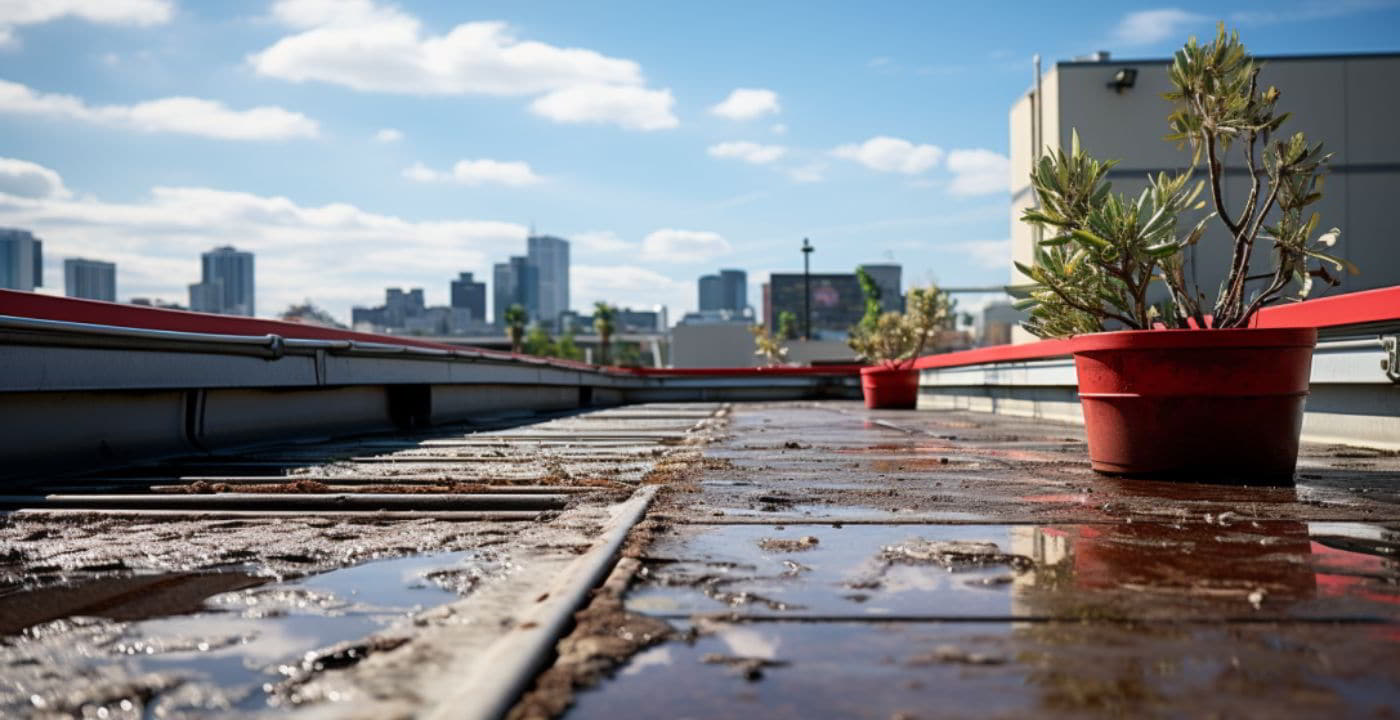
Low-Sloping Roofs
Roofs with a low slope or flat design can accumulate water, especially if they’re covered with shingles not intended for such designs. Pooled water can slowly seep through and cause leaks.
Skylight Issues
Skylights beautify a home by allowing natural light to flow in, however, if they are improperly installed or if their seals wear out over time, they can become a source of leaks.
Cracked Roof Vents
Roof vents facilitate proper attic ventilation. Typically made of plastic or metal, these vents can crack or break with age, particularly if made from plastic that’s become brittle, leading to potential leak points.
How to Confirm a Roof Leak
Identifying and finding a roof leak early on can prevent more extensive damage to your home and save you both time and money in the long run. Here’s a more comprehensive approach to help you detect a potential leak:
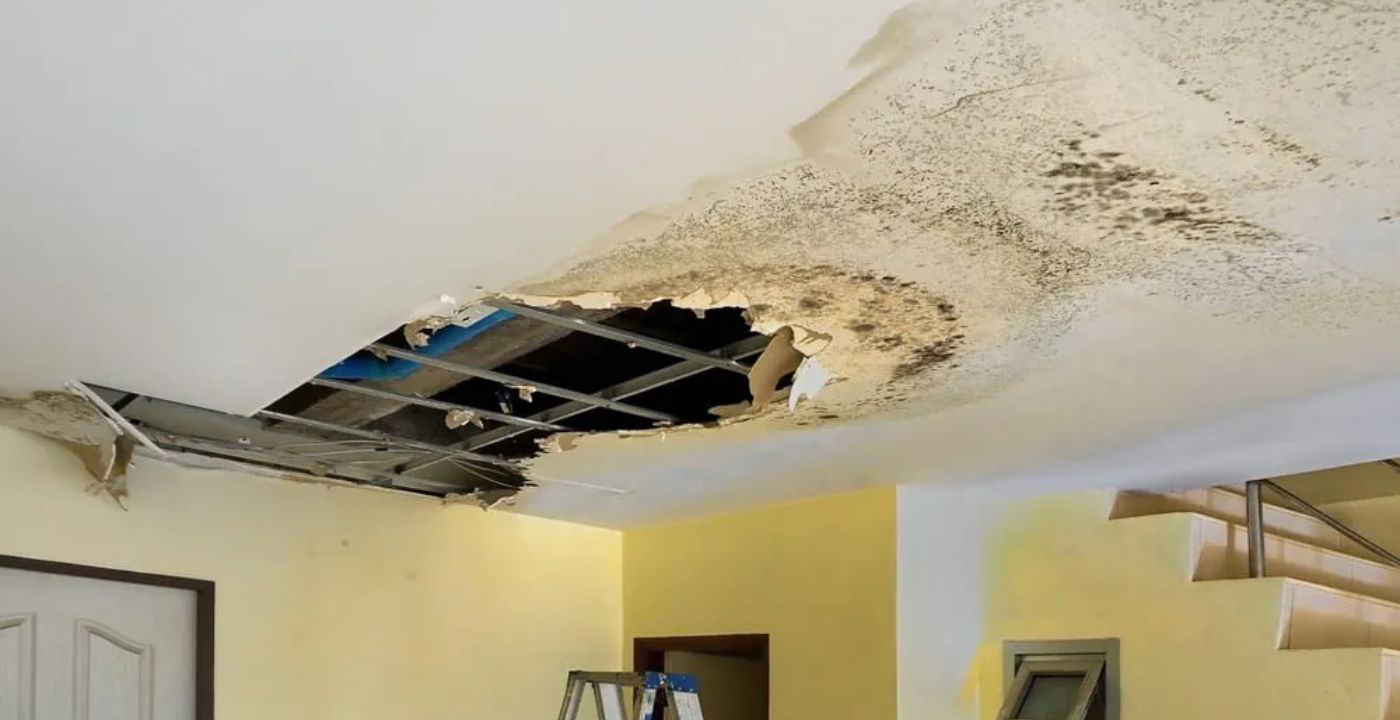
Indoor Inspection
Begin your detective work inside the house. Inspect your ceilings, walls, and floors and look for signs such as:
- Watermarks
- Discolouration
- Peeling paint
- Bulges
- Damp patches on the floor
If you notice consistent wet spots or hear the sound of dripping water, these are clear indicators of an active leak.
Loft or Roof Space Exploration
Often, the first place where a leak will show is in the loft. Using adequate lighting, inspect the loft, paying close attention to areas around roof penetrations as these are often the culprit. Chimneys, roof vents and skylights can also be prime spots for leaks if they’re not sealed correctly.
Damp or darkened timbers, pools of water, or a musty odour are all strong indicators of a roof leak. If you come across a suspicious area, mark it with chalk. Note its location by measuring the distance from two fixed points; this will help you locate the leak from the outside.
External Examination
Refrain from climbing onto your roof, instead, perform a ground-level inspection using binoculars. Look for signs such as missing or damaged shingles, wear and tear around chimneys or vents, and excessive moss or algae growth, which can trap moisture.
Curling, buckling, or blistering shingles can also signal potential weak points. Flashings, the thin strips of metal that cover the intersection or projection of the roofing system (like vent pipes, sky-lights, and chimneys), can corrode or break over time, leading to leaks.
Water Test
If you’re still unsure about the leak’s location, a water test can help. This method is best done with two people: one on the roof with a hose and the other inside the attic with a flashlight.
After ensuring there’s been a dry spell for a few days, wet different roof sections gradually, allowing water to run for several minutes before moving on. The person inside the attic can then watch for signs of dripping or seepage. Remember, water often travels before it drips down visibly, so the leak’s origin might be some distance from the visible water.
What to do if you have a leaking roof
Discovering a leaking roof can be stressful, but it’s crucial to remain calm and take methodical steps to mitigate further damage. Here’s an action plan of what to do if you’re roof is leaking:
Prioritise Safety
Before attempting any remedy, ensure that the area is safe. Turn off the electricity to the affected areas to prevent any accidental electrical mishaps, avoiding contact with exposed wires. Severe leaks will need professional help immediately.
Contain the Leak
Place a bucket underneath the dripping point to catch the water, laying towels down to catch splashes or spills. Move any electronics, furniture, and valuables away from the affected area to reduce further damage and the risk of mould growth.
Apply a Temporary Roof Patch
If it is safe to do so, you could apply a temporary roof patch. Use a scraper or putty knife to spread the roof patch evenly over the leak, this will act as a quick barrier to prevent further water entering the room. Remember, this fix is only temporary and a permanent solution should be sought soon.
Tip: Always repair a leaky roof on a dry, sunny day. This ensures safer conditions and better material adhesion.
Secure and Seal
After applying the roof patch, seal off the edges using a caulking gun to prevent watering from finding a way in. Be sure to focus on noticeable holes and gaps to ensure it is water tight.
Reinforce Your Efforts
To ensure the maximum effectiveness of your temporary patch, consider applying a roof patch tar on top. If you have an extra shingle or a sturdy piece of timber, place it on the tar.
How to Repair a Leaky Roof
Repairing a leaky roof is essential to maintain the integrity of your home. If you’re unsure about the process, always consult a professional who understands roof maintenance and repairs to ensure optimal results. Here’s our step by step guide for leaky roof repairs:
Materials for Leaky Roof Repairs:
To effectively perform a leaky roof repair, it’s essential to have the right materials and tools on hand. Each material serves a specific purpose and ensures the longevity and effectiveness of the fix:
Roofing Nails
These specialised nails are designed to hold roofing materials in place securely and resist the effects of weather.
Roofing Sealant or Cement
A waterproof adhesive that helps seal gaps, joints, and overlaps in roofing materials.
Caulking Gun
A tool that helps apply sealants or adhesives with precision.
Putty Knife
Handy for applying or smoothing out roofing cement and for removing old and flaking sealant.
Replacement Shingles
Extra shingles that match the existing roof, ensuring any replacements blend seamlessly.
Flashing
Thin pieces of impervious material placed to prevent the seepage of water into a structure and increase roof system longevity.
Repairing from the Outside:
The exterior of the roof often showcases the direct signs of damage. Addressing these issues from the outside ensures a more permanent fix:
1. Replace Damaged Shingles
- Start by examining the roof to identify all damaged shingles.
- Using a pry bar, gently lift the damaged shingle and the neighbouring ones to expose the nails. Carefully remove these nails and the shingle.
- Slide the new shingle into place and ensure it aligns with the neighbouring ones.
- Nail the shingle in place using roofing nails. Ensure the heads of the nails are flush with the shingle’s surface.
2. Seal Joints
- Before applying the sealant, ensure the area is free from debris and old adhesive.
- Using a caulking gun, apply the roofing sealant at any joint, seam, or point where walls meet the roof.
- With the putty knife, smooth out the sealant for a neat finish.
3. Fix the Flashing
- Look for sections of flashing that are corroded, bent, or have pulled away from the roof.
- Take out the damaged flashing and clean the area underneath.
- Measure and cut a new piece of flashing that matches the old piece. Shape it into the desired shape.
- Nail the flashing into place and seal the edges with roofing cement.
Repairing from the Inside:
Sometimes, immediate action is needed, and repairs from the inside of the home are more feasible. Here is how to repair a leaky roof from inside:
1. Locate the Leak
- Look for damp patches, mould, or water stains on the underside of the roof.
- Once identified, mark the area to make the repair process efficient.
2. Apply Roof Patch
- Ensure the marked area is free of debris.
- On the underside of the roof, position the roof patch over the leak. Ensure it extends a few inches beyond the damaged area for better protection.
3. Sealant Application
- The area should be dry and clean.
- Using the caulking gun, apply a generous amount of sealant over the patch to form a watertight barrier. Ensure the edges are well-sealed to prevent any future leaks.
How to Prevent Future Roof Leaks
Preventing roof leaks is often more cost-effective and less stressful than dealing with an active leak. Here’s a proactive approach to ensure your roof remains watertight and reduces roof-related costs:
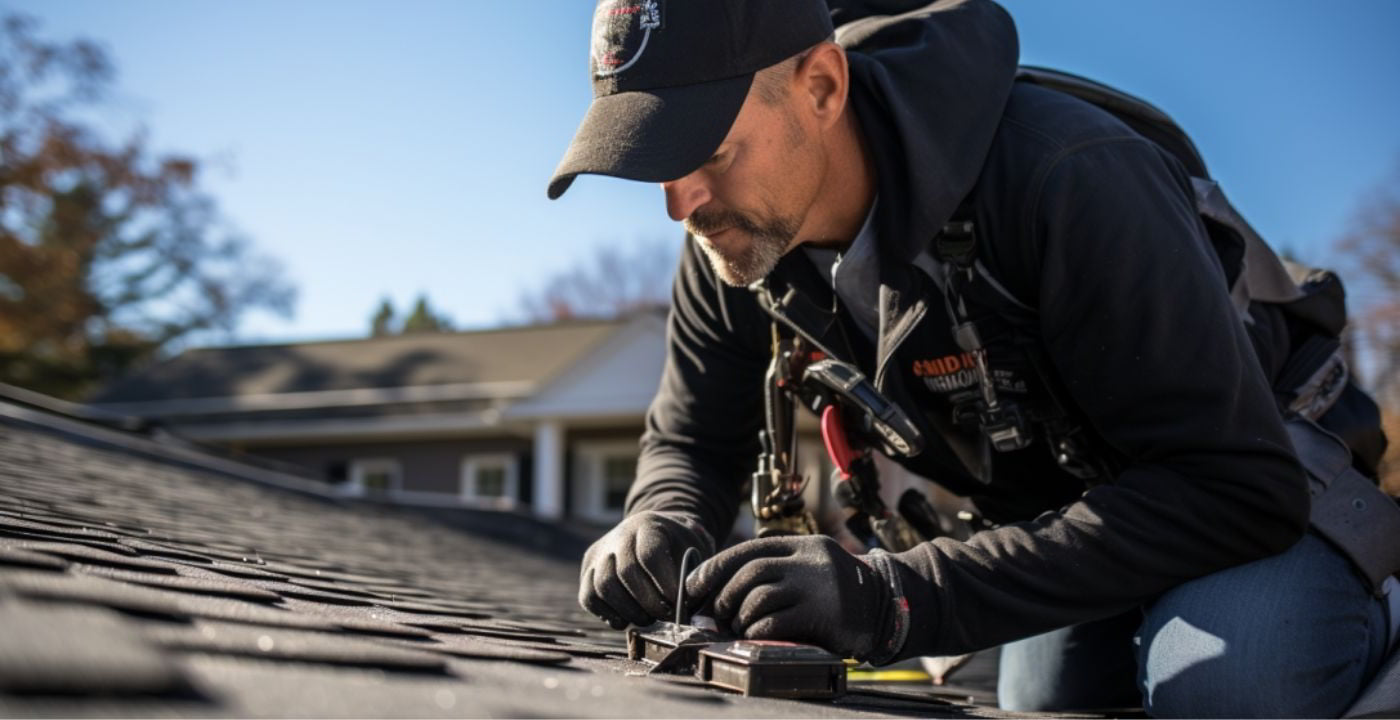
Regular Inspections
Conduct a thorough roof inspection at least twice a year, preferably during spring and fall. Check for any signs of wear, damaged or missing shingles, and other potential problem areas. This will help you address issues before they become severe.
Maintain Your Gutters
Clean gutters and downspouts regularly to ensure water flows away from your home efficiently. Clogged gutters can cause water to back up, increasing the risk of leaks.
Replace Worn Shingles and Flashings
Over time, shingles and flashings can wear out. Replace them promptly when they show signs of ageing or damage. Remember, it’s easier to replace a few shingles now than dealing with a leak later.
Proper Ventilation
Ensure your attic is adequately ventilated. A well-ventilated attic can prevent ice dams, a common cause of roof leaks in colder climates.
Seal Vulnerable Areas
Use a quality sealant to seal areas prone to leaks, such as roof valleys, the base of the chimney, and around skylights.
Trim Overhanging Branches
Tree branches that hang over your roof can drop leaves, leading to clogged gutters, or even fall and damage your roof. Regularly trim these branches to keep your roof safe.
Frequently Asked Questions
How do you repair a leaky flat roof?
Leaky flat roof repairs will first need you to clear any debris and ensure proper drainage. Patching materials designed specifically for flat roofs should be used.
How to repair a leaky tin roof?
Tin roofs, when leaking, typically need sealant application or patchwork at the joints or seams.
Conclusion
Addressing a leaky roof repair promptly is crucial to prevent further damage to your home. Understanding the causes of leaks, confirming their presence, and knowing the steps for effective repair can safeguard your home.
Whether it’s replacing damaged shingles, sealing gaps, or patching holes, each method serves as a means to protect and ensure the longevity of your roof. In all instances, safety is paramount, and if unsure, seeking professional assistance is always recommended.
Don’t let a leak dampen your day- contact our expert team today who can seal the deal and keep your home dry!


